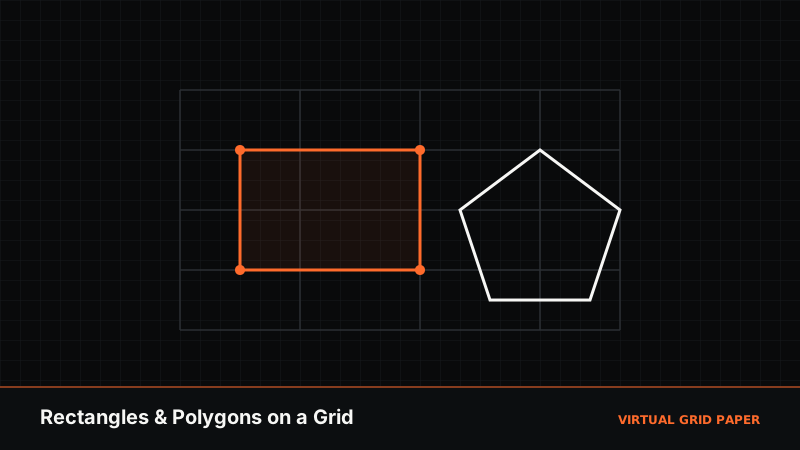
Rectangles and polygons are the backbone of most diagrams — floor plans, charts, geometric figures, and technical sketches all start with straight-edged shapes. Drawing them on an online grid means every corner lands on an exact point and every side is a known length, so the shapes come out clean without a ruler.
This guide shows how to draw rectangles, squares, triangles, and multi-sided polygons on the Virtual Grid Paper drawing canvas, using snap-to-grid and live length readouts to keep everything precise.
Key Takeaways
- The rectangle tool draws squares and rectangles with true right angles.
- The polygon tool builds triangles and n-gons vertex by vertex.
- Snap-to-grid locks every corner to an exact coordinate.
- Live length readouts let you size each side exactly.
Table of Contents
- Drawing Rectangles and Squares
- Building Polygons Vertex by Vertex
- Sizing Sides with Live Readouts
- Editing and Moving Shapes
- Practical Examples
- Common Mistakes
- Frequently Asked Questions
1. Drawing Rectangles and Squares
The Rectangle tool is the quickest way to lay down a four-sided shape:
- Open the drawing canvas and select the Rectangle tool.
- With snap-to-grid on, click one corner and drag to the opposite corner.
- The sides align to the grid automatically, producing true right angles.
- Release to finish.
To draw a perfect square, drag so the width and height span the same number of cells — for example four cells across and four down. Because the corners snap to intersections, the sides are exactly equal.
2. Building Polygons Vertex by Vertex
The Polygon tool handles any straight-edged shape beyond a rectangle:
- Select the Polygon tool.
- Click to place the first vertex, then click each subsequent corner. The tool connects them with straight edges.
- Close the shape by returning to the starting vertex.
This is how you build triangles, pentagons, hexagons, and irregular shapes. Every vertex snaps to the grid, so even a freeform polygon has clean, exact corners. For triangles specifically, snapping guarantees the vertices sit on precise coordinates, which matters when you later measure angles.
3. Sizing Sides with Live Readouts
As you draw each edge, the canvas reports its length. Use that to size shapes deliberately:
- Draw a rectangle exactly 6 × 4 units by watching the readout on each side.
- Build an isosceles triangle by making two edges the same reported length.
- Lay out a scale diagram where one cell equals a real-world unit.
Combined with numbered axes, the readouts let you treat the grid as a measuring surface, not just a backdrop.
Draw a shape now
Open the drawing canvas →4. Editing and Moving Shapes
Nothing is permanent. Switch to the Select tool to pick up a rectangle or polygon and drag it elsewhere — the vertices re-snap to the grid when you release, so the shape stays aligned. The Eraser removes a shape entirely. Because you can undo any step, experimenting is risk-free.
5. Practical Examples
- Floor-plan sketch — rectangles for rooms, sized so one cell equals a set distance.
- Bar chart — evenly spaced rectangles of measured heights.
- Geometry homework — triangles and quadrilaterals with exact side lengths and labelled vertices.
- Tiling pattern — repeated polygons that share edges cleanly thanks to snapping.
For a broader look at constructing figures, see drawing geometric shapes on graph paper.
6. Common Mistakes
- Snapping off — the fastest route to a lopsided rectangle. Keep it on.
- Not closing a polygon — return to the first vertex so the shape is complete.
- Ignoring the length readouts when a shape needs exact dimensions.
- Redrawing instead of selecting — move shapes with Select rather than starting over.
When to Use the Shape Tools
Use the rectangle and polygon tools whenever a drawing needs straight, measured edges: plans, charts, geometric figures, and layout mockups. For curved or organic forms, use the circle, arc, or freehand tools instead.
Related Tools and Guides
- How to draw a circle on digital graph paper
- Online geometry drawing tools
- How to use snap-to-grid
- Open the drawing canvas
Conclusion
Drawing rectangles and polygons on an online grid removes the two hardest parts of doing it by hand: keeping corners aligned and sides the right length. Snap-to-grid handles alignment, live readouts handle measurement, and the select and eraser tools make editing painless. The shapes you build are precise, repeatable, and ready to export.
Frequently Asked Questions
How do I draw a perfect square?
Use the rectangle tool with snap-to-grid on and drag so the width and height cover the same number of cells. The vertices lock to exact intersections, giving equal sides and true right angles.
How does the polygon tool close a shape?
Click each vertex in turn; the polygon tool connects them with straight edges. Close the shape by clicking back on the starting vertex or completing the last edge, and every corner snaps to the grid.
Can I see the length of each side as I draw?
Yes. The canvas shows a live length readout as you draw edges, so you can size each side precisely and build shapes to exact dimensions.
Can I edit a shape after drawing it?
Yes. Use the select tool to move a shape, and the eraser to remove it. Because vertices re-snap to the grid when moved, alignment is preserved during edits.