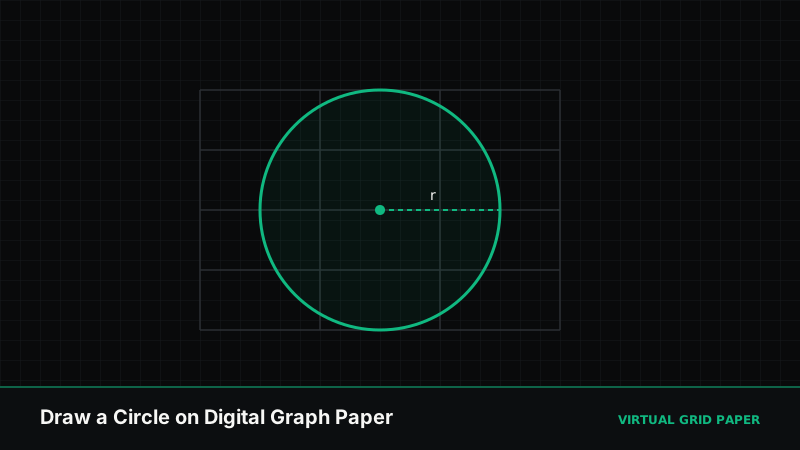
Drawing a freehand circle almost never comes out round, and a compass can slip or leave stray marks. On digital graph paper you place a center, drag out the radius while watching a live readout, and release — a perfect circle, sized exactly as you intended.
This guide covers drawing circles on the Virtual Grid Paper drawing canvas: setting the center, controlling the radius, snapping to the grid, and using circles as building blocks for larger geometric constructions.
Key Takeaways
- Place a center point, then drag to set the radius with a live readout.
- Snap-to-grid locks the center to an exact coordinate.
- Reuse the same center for concentric circles.
- Use the separate arc tool for partial curves.
Table of Contents
- Why Draw Circles on a Grid
- Step-by-Step: Drawing a Circle
- Setting an Exact Radius
- Concentric and Intersecting Circles
- Circles in Geometric Constructions
- Common Mistakes
- Frequently Asked Questions
1. Why Draw Circles on a Grid
A grid gives a circle two things a blank page cannot: a precise center coordinate and a measurable radius. Because the center snaps to an intersection and the radius is reported live, you can place a circle at exactly (5, 5) with a radius of exactly 3 — and reproduce it identically whenever you need to. That repeatability is what makes grid circles useful for math, coordinate geometry, and technical drawing.
2. Step-by-Step: Drawing a Circle
- Open the drawing canvas and select the Circle tool.
- Make sure snap-to-grid is on so the center lands on an exact point.
- Click once to place the center at your chosen coordinate.
- Drag outward — a circle grows from the center and a radius readout updates as you move.
- Release when the radius reaches the value you want.
That is the whole process. To move the finished circle, switch to the Select tool and drag it; the center re-snaps to the nearest intersection.
3. Setting an Exact Radius
The live radius readout is what turns “roughly round” into “exactly right.” Rather than eyeballing, drag slowly and watch the number climb. Release at the target — say 4 units — and the circle is guaranteed to match.
If you need several circles of the same size (for a pattern or a row of wheels in a diagram), note the radius value and repeat the drag to the same figure. Snapping the centers to grid points keeps them evenly spaced.
Draw a circle now
Open the drawing canvas →4. Concentric and Intersecting Circles
Concentric circles share one center. Place your center point, draw a circle, then draw another from the same intersection with a larger radius. The result is a set of rings — useful for targets, radial diagrams, and range rings.
Intersecting circles are the heart of classic constructions. Two circles of equal radius, each centered on the other’s center, cross at two points that define a perpendicular bisector and an equilateral triangle. Snapping makes those intersection points easy to mark with the Point tool.
5. Circles in Geometric Constructions
Circles are the compass of digital geometry. With them you can:
- Bisect a segment — draw equal circles from each endpoint and connect the intersections.
- Build an equilateral triangle — two equal circles plus their intersection point.
- Inscribe shapes — use a guiding circle to place vertices at equal distances from a center.
Because each step relies on exact centers and radii, the constructions come out clean. Pair the circle tool with the full geometry toolset to complete more complex figures.
Worked example — an equilateral triangle. Place a point at (3, 4) and another at (9, 4), six units apart. Draw a radius-6 circle centered on each. The two circles cross at (6, 4 + 5.196) and (6, 4 − 5.196) — because the height of an equilateral triangle is √3⁄2 × side ≈ 0.866 × 6 ≈ 5.196. Connect either intersection to the two original points and you have a triangle with three exactly equal sides. The grid and the live readout do the measuring for you.
6. Common Mistakes
- Placing the center with snapping off, so concentric circles drift apart. Keep snapping on.
- Guessing the radius instead of reading the live value — the readout exists to make circles exact.
- Confusing circle and arc. Use the circle tool for full circles and the arc tool for partial curves.
- Forgetting to export. Save your construction as PNG, SVG, PDF, or JSON when finished.
When to Use the Circle Tool
Use it any time you need a precise round shape: geometry constructions, coordinate diagrams, radial charts, technical parts, or decorative patterns. For a freehand, hand-drawn look, turn off snapping and use the freehand tool instead.
Related Tools and Guides
- Online geometry drawing tools
- How to draw rectangles and polygons on a grid
- How to use snap-to-grid
- Open the drawing canvas
Conclusion
A circle on digital graph paper is only ever as hard as clicking a center and dragging to a radius. Snap-to-grid guarantees a precise center, the live readout guarantees an exact size, and the arc and point tools let you extend circles into full geometric constructions. It is the compass, minus the slipping and the stray pencil marks.
Frequently Asked Questions
How do I set an exact radius for my circle?
Select the circle tool, click to place the center, then drag outward. The canvas shows a live radius readout as you drag, so you can release when it reaches the exact value you want.
Will my circle’s center snap to a grid point?
Yes. With snap-to-grid enabled, the center locks to the nearest intersection, which makes it easy to place circles at precise coordinates and to reproduce them consistently.
Can I draw concentric circles?
Yes. Place multiple circles on the same center point with different radii. Because the center snaps to the same intersection each time, the circles share a common center exactly.
Is there a tool for partial circles or arcs?
Yes. The canvas includes a separate arc tool for drawing partial curves and sectors, which is useful for angle spans, rounded corners, and construction marks.