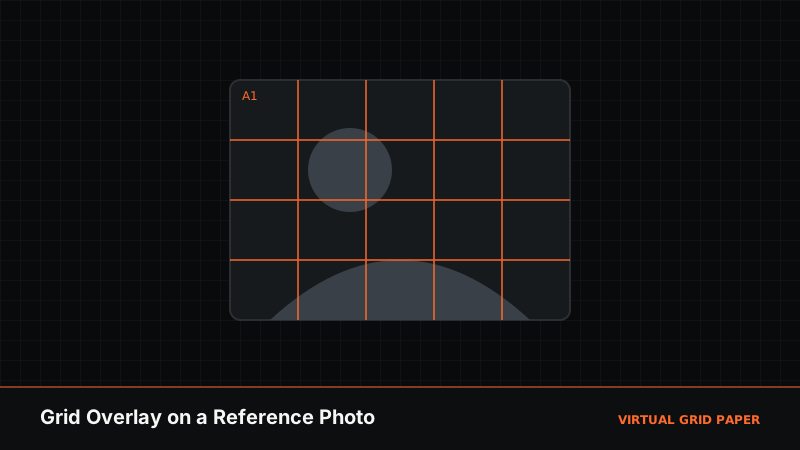
The grid method is one of the oldest and most reliable ways to reproduce a photo accurately by hand: overlay a grid on your reference, draw the same grid on your paper, and copy the image one square at a time. The Virtual Grid Paper grid overlay tool does the first half digitally — no ruler, no measuring, no marking up an original print.
This guide walks through the tool end to end: uploading a photo, setting the grid, styling the lines, adding guides like diagonals and rule-of-thirds, and exporting a clean gridded reference.
Key Takeaways
- Upload a photo and set rows and columns to grid it instantly.
- Adjust line color, width, opacity, and labels for a readable grid.
- Add diagonals and a rule-of-thirds guide for composition.
- The image is processed locally in your browser and exports as PNG or JPG.
Table of Contents
- What the Grid Overlay Tool Does
- Uploading Your Reference Photo
- Setting Rows, Columns, and Labels
- Styling Lines and Adding Guides
- Framing and Exporting
- Common Mistakes
- Frequently Asked Questions
1. What the Grid Overlay Tool Does
The grid overlay tool places an adjustable grid on top of a photo you provide, so you can transfer the image to paper or canvas square by square. Unlike marking up a printed photo with a pen, the overlay is non-destructive: you can change the grid density, colour, and guides as often as you like, and the original image is never altered.
Everything happens in your browser. When you choose a photo, it is loaded and drawn locally on your device — the tool does not send your image to a server for processing. That keeps your references on your own machine while you work.
2. Uploading Your Reference Photo
Open the tool and add your image (uploads up to 25 MB are supported):
- Select or drop the photo you want to draw from.
- The image appears in the workspace with a grid already laid over it.
- Use the fit option to choose how the image sits in the frame — contain shows the whole photo, cover fills the frame and crops the edges.
- If you need a closer look, use scale (zoom) and pan to position the image; this only affects the view and framing, not the exported proportions of the grid.
A high-resolution reference gives you more detail to copy, but even a phone photo works well for the grid method.
3. Setting Rows, Columns, and Labels
The grid itself is defined by how many cells you want:
- Rows and columns can each be set from 1 to 100. Fewer, larger cells suit simple subjects and beginners; more, smaller cells give finer control for complex or detailed images.
- Lock square keeps cells perfectly square by matching the spacing in both directions — useful when you want the paper grid to match exactly.
- Labels can mark each cell or just the perimeter, so square “B3” on the photo maps to square “B3” on your paper. This numbering is what makes the grid method fast and error-resistant.
Start with a coarser grid (say 6×8) and increase the count only if you need more reference points. An over-dense grid is harder to read than it is helpful.
4. Styling Lines and Adding Guides
A grid only helps if you can see it clearly against the photo:
- Line color — pick a colour that contrasts with the image (bright lines over a dark photo, dark lines over a light one).
- Line width — adjustable from 1 to 20 px so the grid reads without burying detail.
- Line opacity — from 5 to 100, letting you make the grid a faint guide or a bold framework.
- Image opacity — dim the photo itself so the grid and your reference points stand out.
Beyond the plain grid, the tool adds two composition guides:
- Diagonals — corner-to-corner lines that help you check angles and place features along natural diagonals.
- Rule of thirds — the classic 3×3 composition guide, handy for planning where a subject sits in the frame.
Grid your reference photo
Open the grid overlay tool →5. Framing and Exporting
When the grid and guides look right, export the result:
- Export PNG for a crisp, lossless gridded image — the best choice if you will view it on screen while drawing.
- Export JPG for a smaller file when you want to print the reference or send it to a phone.
A common workflow is to draw the same grid on your paper — either by hand or from the printable graph paper generator — then copy the photo one cell at a time. Matching labels on both grids means you always know which square you are working in. For the drawing technique itself, see how to use the grid method for portrait drawing and the broader grid method history and guide.
6. Common Mistakes
- Too many cells on a simple subject — start coarse and add detail only where needed.
- Low-contrast grid lines that disappear into the photo; choose a contrasting colour and raise the opacity.
- Mismatched paper grid — the grid on your paper must have the same number of rows and columns as the overlay, or squares will not correspond.
- Forgetting labels, which makes it easy to lose your place in a dense grid.
When to Use This Tool
The grid overlay tool is for copying a photo to paper or canvas by hand. If instead you want to add a grid to a photo for a different reason — say, a printable practice sheet — the approaches in how to add a grid to any photo for drawing are worth a look. To draw directly on a digital grid rather than copy onto paper, use the drawing canvas; to build a multi-photo collage, use the photo grid maker.
Related Tools and Guides
- Using grid overlays on reference photos
- How to use the grid method for portrait drawing
- How to scale drawings using grids
- What is the grid method? A complete history and guide
Conclusion
The grid overlay tool digitises the setup step of the grid method: upload a photo, choose your rows and columns, style the lines so they read clearly, and export a gridded reference — all locally in your browser. Pair it with a matching grid on your paper, and reproducing any image becomes a calm, square-by-square process rather than a test of freehand accuracy.
Frequently Asked Questions
How do I put a grid over a reference photo?
Open the grid overlay tool, upload your photo, then set the number of rows and columns. The grid appears over the image instantly and you can adjust line color, width, opacity, and labels before exporting.
Are my uploaded photos sent to a server?
No. The grid overlay tool runs entirely in your browser and processes the image locally on your device. The photo is not uploaded to a server for processing.
Can I number the grid cells to match my paper?
Yes. The tool can label cells or the perimeter so each square on the photo corresponds to the same square on your drawing surface, which is the core of the grid method.
What can I export from the grid overlay tool?
You can export the gridded image as a PNG or JPG. You can also adjust the image opacity, add diagonals or a rule-of-thirds guide, and zoom or pan before exporting.