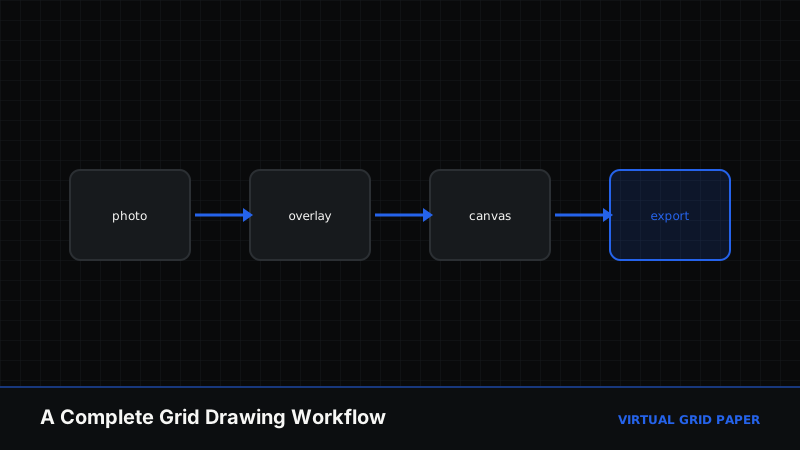
Individually, each Virtual Grid Paper tool solves one problem. Chained together, they form a complete digital drawing workflow: take a reference photo, grid it, get the proportions right, draw it on a matching grid, and export a clean result — without printing anything or installing software. This guide walks that pipeline tool by tool.
You can start from the tools overview to see everything in one place; below, we put the relevant ones in order.
Key Takeaways
- A full grid-method workflow runs in the browser, start to finish.
- Grid the reference, match proportions, draw on a matching grid, export.
- Reference images are processed locally on your device, not uploaded.
- Works fully digital, or print a matching sheet to draw by hand.
Table of Contents
- The Workflow at a Glance
- Step 1 — Grid Your Reference
- Step 2 — Match the Proportions
- Step 3 — Draw on a Matching Grid
- Step 4 — Export and Reuse
- Common Mistakes
- Frequently Asked Questions
1. The Workflow at a Glance
The grid method has always been four steps: grid the reference, grid the drawing surface, match proportions, then copy square by square. The digital version keeps the logic and removes the friction:
| Step | Tool | Result |
|---|---|---|
| Grid the reference | Grid overlay | Photo with a labelled grid |
| Match proportions | Aspect ratio calculator | Correct canvas dimensions |
| Draw on a grid | Drawing canvas | Artwork on a matching grid |
| Export / reuse | Drawing canvas export | PNG, SVG, PDF, or JSON |
Everything below expands those rows. All of it runs in the browser, and the reference image never leaves your device.
2. Step 1 — Grid Your Reference
Open the grid overlay tool and add the photo you want to draw. Then:
- Set the rows and columns — start coarse (say 6×8) and add cells only if the subject is detailed. A rough rule: fewer, larger cells (4×6) suit simple shapes and faster work, while fine detail like a face or machine part rewards 8×10 or more. Doubling the cell count roughly quadruples the squares you copy, so add density only where accuracy demands it.
- Turn on labels so each square has a name like B3; you will match these on your canvas.
- Adjust line colour and opacity so the grid reads clearly against the image, and dim the image opacity if that helps.
- Optionally add the rule-of-thirds guide to check your composition.
The tool grids the image non-destructively and processes it locally — see how to use a grid overlay on a reference photo for the full detail. Export the gridded reference so you can keep it beside your canvas.
3. Step 2 — Match the Proportions
Your drawing surface has to share the reference’s proportions, or squares will not line up. This is where the aspect ratio calculator earns its place:
- Enter the reference’s dimensions to read its ratio.
- Use resize mode to find the canvas width and height that keep that ratio at the size you want to work at.
With matching proportions and the same number of rows and columns on both grids, square “B3” on the reference maps exactly to “B3” on your canvas. The scaling principle behind this is covered in how to scale drawings using grids.
4. Step 3 — Draw on a Matching Grid
Now open the drawing canvas and recreate the image square by square:
- Snap-to-grid keeps your lines and points landing precisely on the grid, so proportions stay honest.
- Use the geometry tools — line, circle, rectangle, polygon, and freehand — to build up each cell’s content.
- The numbered axes and live length/angle readouts help you place elements accurately.
- Work one labelled square at a time, matching what you see in that square on the gridded reference.
Because the canvas auto-saves in your browser, you can step away and return without losing progress. For a deeper tour of the canvas, see how to use the virtual grid paper drawing canvas and the snap-to-grid guide.
See all the grid tools
Open the tools overview →5. Step 4 — Export and Reuse
When the drawing is done, the canvas exports in several formats:
- PNG for a finished raster image to share.
- SVG for a scalable vector you can refine in design software.
- PDF for printing or documents.
- JSON — a reopenable project file, so you can save the drawing and return to edit it later.
Saving the JSON is the key to an iterative workflow: it preserves your work as editable objects, not a flattened image, so a portrait or diagram can evolve over several sessions. Export details are in exporting your online graph paper drawing and saving and recovering your drawing.
If you would rather finish on paper, print a matching grid from the printable graph paper generator at the same rows and columns and copy from the gridded reference by hand — the digital and paper routes share the same grid logic.
6. Common Mistakes
- Mismatched grid counts between the reference and the canvas, so squares do not correspond.
- Skipping labels, which makes it easy to lose your place mid-drawing.
- Ignoring proportions and stretching the subject — settle the ratio before you start.
- Exporting only a flat PNG when you may want to keep editing; save the JSON too.
When This Workflow Helps
This pipeline shines for accurate representational work from a reference — portraits, still lifes, buildings, and detailed studies — where proportion is the hardest part. For free, imaginative drawing you may not need the reference-gridding steps; just draw on the canvas with snap-to-grid. And for teaching the method, the labelled grids make it easy to show a class exactly how each square maps across.
Related Tools and Guides
- How to use a grid overlay on a reference photo
- How to use the virtual grid paper drawing canvas
- How to scale drawings using grids
- What is the grid method? A complete history and guide
Conclusion
Chained together, the grid tools turn the classic grid method into a smooth digital pipeline: grid the reference, match the proportions, draw on a matching grid with snap-to-grid, and export in the format you need — with the option to save an editable project and pick it up later. Nothing is printed unless you want it to be, and your reference images stay on your own device throughout.
Frequently Asked Questions
What tools do I need for a grid-based digital drawing workflow?
You can do the whole workflow in the browser: the grid overlay tool to grid a reference photo, the aspect ratio calculator to keep proportions right, and the drawing canvas to draw on a matching grid and export the result.
Do I still need paper for the grid method?
No. You can keep the whole process digital — grid the reference on screen and draw on the digital canvas with snap-to-grid — or print a matching sheet if you prefer to draw by hand. Both approaches use the same grid principle.
Are my reference photos kept private in this workflow?
The tools run in your browser and process images locally on your device, so reference photos are not uploaded to a server. They stay on your machine while you work.
How do I keep the reference and my canvas at the same proportions?
Use the aspect ratio calculator to find matching dimensions, then set the same number of rows and columns on the grid overlay and your drawing grid so each square corresponds.